
A design brief is the single document that keeps a design project from drifting off course. Get it right, and everyone involved, from the client to the designers and every reviewer in between, works from the same set of goals and constraints instead of guessing at what “done” looks like.
This guide breaks the process down into 8 steps, with templates you can adapt for any type of project, whether that’s a website redesign, a logo, a marketing campaign, or a full brand identity.
Key Takeaways
- A design brief is a document that outlines the objectives, requirements, and expectations of a design project.
- To write an effective design brief, choose the right project management software to organize your work and collaborate with your team.
- Describe the project clearly and concisely in the design brief, including specific details about what needs to be accomplished and any specific requirements or constraints.
- Set SMART goals for your project – Specific, Measurable, Achievable, Relevant, and Time-bound – to provide clarity and track progress.
- Define the target audience for your design project by conducting research on their demographics, interests, preferences, and behaviors.
- Determine the budget and timeline for your project to ensure all stakeholders understand the scope of work and avoid delays or overspending.
- Identify expected deliverables from your design project so everyone knows what needs to be created.
- Include any other relevant information in your design brief such as specific requirements or preferences that will help guide designers in meeting your vision.
What is a Design Brief?
A design brief is a document that lays out the objectives, requirements, and expectations of a design project. Think of it as the reference point everyone returns to: it keeps designers, clients, and stakeholders aligned on the same goals instead of working from separate assumptions.
Because it spells out direction up front, a design brief tends to shorten the design process itself and produce results that actually match what the client asked for, instead of several rounds of revisions after the fact.
Definition
At its core, a design brief tells the team what the project needs to accomplish and who it’s ultimately for. It lays out the scope of the work, states the goals plainly, and identifies who will use the finished result, while also setting boundaries on what’s realistically achievable within the project.
From there, the team treats the brief as its working roadmap for every task that follows.
Why It’s Important
The value of a design brief comes down to clarity: it gives everyone a shared, unambiguous view of what the project has to deliver. It also steers the team toward the right methods and tools, since work tasks, goals, and deadlines are already spelled out rather than negotiated mid-project.
That shared understanding cuts down on confusion and mixed signals between everyone involved. Having the brief in place ensures that every step taken is actually aimed at the outcome the project or business needs, rather than at someone’s individual interpretation of it.
How to Write a Design Brief in 8 Easy Steps
Here’s the sequence that produces a usable design brief, step by step:
- Pick your design brief project management software. This will help you organize the work.
- Write about your project. Make it clear and short.
- Set SMART goals for your project. These goals should be specific, measurable, achievable, relevant, and time-bound.
- Know who your target audience is. Understand their needs and wants.
- Decide how much money and time you can spend on the project.
- Think about what items you should deliver at the end of the project.
- Add other important details that might help your team understand the project better.
- Share all this information with your team so they know what’s going on.
Step 1: Choose Your Design Brief Project Management Software
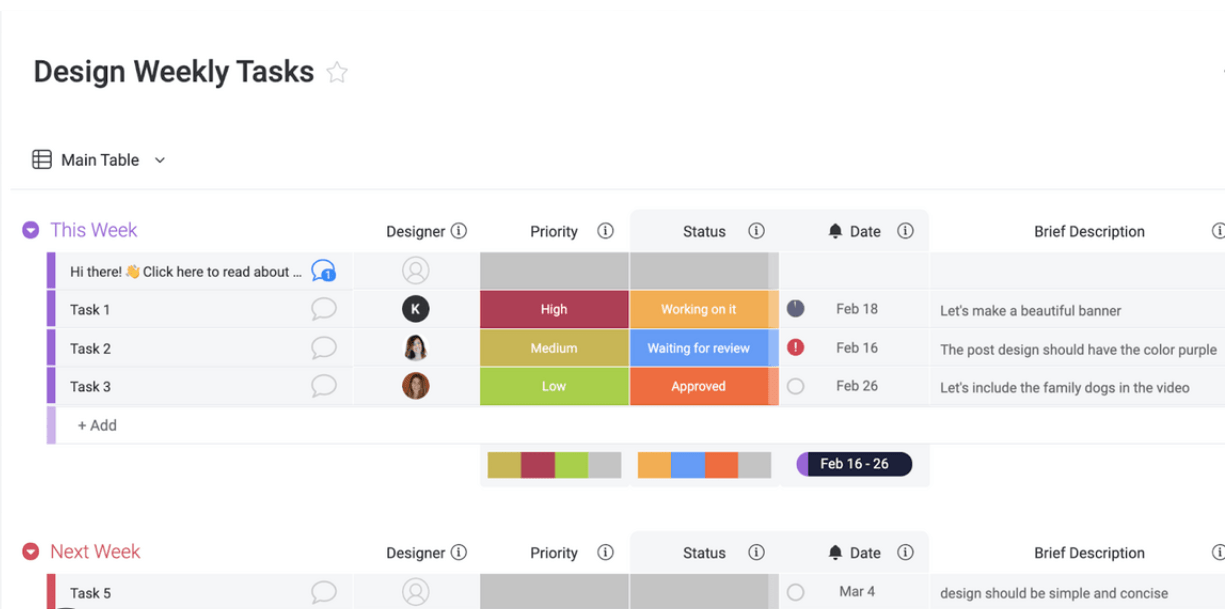
Before you start writing a design brief, pick the project management software you’ll use to build and store it. This is what keeps you and your team organized once the real work starts.
Look for a tool that lets you keep every version of your design brief documents in one place, alongside task assignments, deadlines, and a way to communicate with the team. Most teams already use some form of project management software elsewhere in the business, so it often makes sense to house the brief there rather than in a separate system.
With the right software in place, tracking progress and sharing files becomes routine rather than a hassle, and everyone stays on the same page for the length of the project.
This choice matters more than it might seem, because the software becomes the central place where every part of the design brief lives. It removes the confusion that comes from scattered documents and makes sure everyone has access to the latest version.
A well-chosen platform keeps your workflow organized and reduces the chance that something important slips through the cracks. It’s worth spending a little time comparing options before you commit, since this decision shapes every step that follows, from how deliverables get tracked to how easily a new team member can get up to speed.
Step 2: Describe the Project
Write a clear, concise description of the project in the brief itself. This is the section where you explain exactly what you’re trying to achieve, what needs to happen, and any specific requirements or constraints that apply.
For a website design, spell out what pages and features it needs. For a branding project, note specific elements like the logo, colors, and fonts you want used.
The more information you provide here, the easier it is for your team to understand exactly what you want, which keeps everyone working from the same picture.
Be specific about the goals behind the project. Are you trying to increase brand awareness, or generate more leads? Naming the objective clearly lets the team align their work to it instead of guessing.
It also helps to mention any inspiration or references that could guide the creative direction. Sharing examples of designs or styles that match your vision gives your team useful context to work from.
Covering all of this in the project description makes it easier for everyone involved, from designers to developers, to understand what’s expected and deliver against it.
Step 3: Set SMART Goals
A successful design project depends on setting SMART goals: Specific, Measurable, Achievable, Relevant, and Time-bound. That means your goals need to be clear and well-defined enough that everyone involved knows exactly what has to get done.
They also need to be measurable, so progress can actually be tracked and you can tell whether a goal has been met.
Make sure the goals are achievable given the resources and constraints you’re working with, and that they stay relevant to the brief’s overall objectives and to what your target audience actually needs.
Finally, attach deadlines to each goal so it’s time-bound. That keeps everyone accountable and keeps the project moving instead of stalling.
SMART goals in the brief give the team a clear roadmap to work from and raise the odds of a genuinely strong outcome for the project. Without them, it’s easy for a project to drift: deadlines slip, scope creeps, and nobody can say definitively whether the work succeeded or not.

Step 4: Define the Target Audience
An effective design brief also has to define the target audience: the specific group of people who will actually experience or use whatever gets designed.
Understanding that audience is what lets you create a design that resonates with them and actually meets their needs.
To define the target audience properly, you need real research into their demographics, interests, preferences, and behaviors, covering factors like age, gender, location, education, income, hobbies, and buying habits.
Once you understand those characteristics and preferences, you can shape the design to appeal to them directly. A brand targeting tech-savvy young adults interested in gaming, for instance, might call for bold colors and dynamic visuals.
Defining the audience goes beyond demographics, too. It means understanding the pain points and challenges they face, so that user experience designers can build something that addresses those concerns directly rather than in the abstract.
In short, defining the target audience is essential because it’s what makes sure the finished product actually speaks to the people who will use it, rather than to whoever happened to be in the room when the design decisions got made.
Designers who take the time to understand this part of the brief in depth are able to create work that genuinely engages, resonates with, and serves the people it’s meant for.

Step 5: Determine Budget and Timeline
Before getting into the creative side of the project, it’s worth nailing down the practical side first. A thorough design brief states the estimated budget and timeline so every stakeholder shares the same understanding of scope. That single piece of information heads off a lot of misunderstandings later in the project and keeps things on track.
| Budget | Timeline |
|---|---|
| This pertains to the estimated total cost of the project. Costs may include designing, development, testing, and implementation stages. Keep in mind, it should be realistic and clearly defined to avoid ambiguity. | The timeline indicates the project duration. This includes the start date, key milestones, and the expected completion date. A well-defined timeline ensures that all team members are aware of the deadlines and helps in keeping the project on track. |
Budget and timeline aren’t just line items, they’re what keeps the project inside its resource limits and moving forward without delays or overspending. Skip this step, and even a well-designed project can stall simply because nobody agreed in advance on what it was allowed to cost.

Step 6: Identify Expected Deliverables
This step is about naming the specific outcomes you expect from the project, known as deliverables. That could mean a logo, a website design, or a set of marketing materials.
Be specific about what you want, and put it in writing in the brief. That’s what keeps everyone on the project clear on what needs to be produced and keeps the whole thing organized.
Take the time to think through every piece your project might need, and list each one as an expected deliverable so nothing gets missed. Be clear and specific, list every element that should be included, and add examples wherever you can so the team can visualize exactly what’s expected. Getting this right means everyone knows precisely what has to be created by the end of the project, which also makes it far easier to tell, at handoff, whether the project actually delivered what was promised.
Step 7: Include Any Other Relevant Information
Use this step to add anything else relevant to the project that hasn’t already been covered: specific requirements or preferences, existing branding guidelines, source materials, inspiration, or any other detail that helps designers understand what you’re after.
These extra details give designers a clearer picture of what you’re trying to achieve, which helps them make better decisions about design elements and keeps the output aligned with your vision and goals.
Be as specific as you can. The more detail you provide, the better the designers will understand what you expect, and the more likely the final result matches it.
For a branding project, that might mean sharing the business’s mission statement, target market demographics, and brand voice and personality. For a marketing materials or website redesign project, note your preferences on color schemes, imagery style, or typography.
Adding this kind of information sets clear expectations from the start and points designers toward something that actually meets your needs, rather than leaving them to fill in the gaps with their own assumptions.
Step 8: Share with Your Team
Once the brief is finished, share it with your team. This is what puts everyone on the same page about the project’s objectives and requirements.
It also heads off confusion and encourages people to actually collaborate with each other rather than work in isolated silos on their own assumptions.
Project management software or a collaboration tool is usually the easiest way to share it, since it lets the whole team access the document and add input or questions as needed.
Consider walking your team through the brief directly, in person or over a call, rather than just dropping a document in a shared folder. That gives everyone a chance to ask clarifying questions, raise suggestions, and flag concerns before work starts, which is far cheaper to do now than after the first draft is already built.
Clear communication matters here more than anywhere else in the process. Make sure everyone understands their role, their responsibilities, and the deadlines and deliverables laid out in the brief.
Sharing the brief this way builds a collaborative environment where the whole team is working toward the same goal, and it sets the foundation for the project by aligning expectations and letting each person contribute their expertise toward the final design.

Design Brief Template
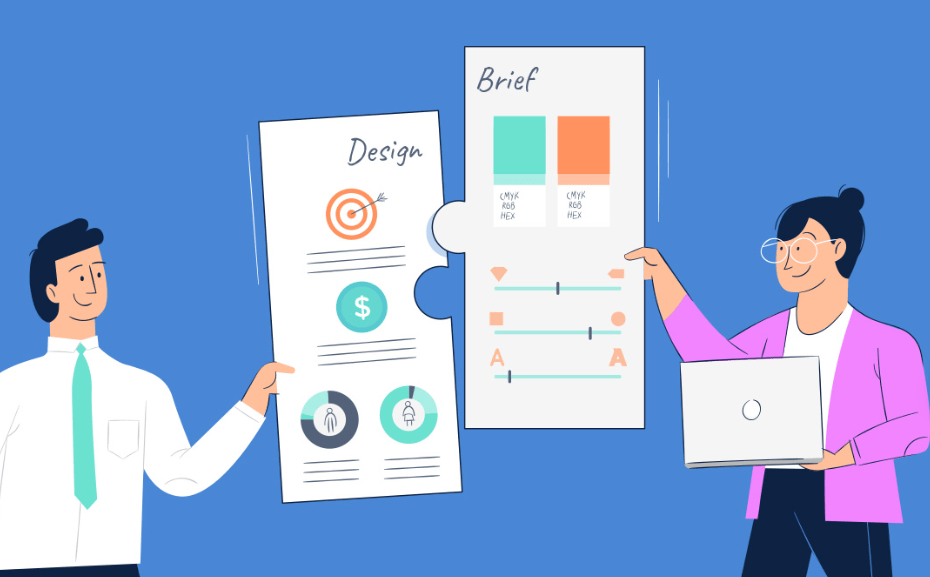
A design brief template makes the whole process faster because you’re not starting from a blank page. It gives you a ready-made structure and format to fill in.
A good template includes sections for the project description, objectives and goals, target audience, budget and timeline, deliverables, and any other relevant details.
Using one helps make sure you cover all the necessary information in an organized way, saves time, and keeps you focused on what belongs in each section.
Whether you’re working on graphic design, branding, UX, or product design, the same template structure can be adapted to fit the specific project.
Having that structure in hand from the start makes it easier for your team to understand exactly what the project requires and expects.
Using a design brief template ultimately sets everyone up for success by giving the whole creative process clarity and direction from day one.
Examples of Effective Design Briefs
A few examples of what a strong design brief looks like in practice:
- A design brief for a marketing campaign that clearly outlines the project description, objectives, target audience, and goals. It also includes an analysis of the competition and specific deliverables.
- A design brief for a website redesign that defines the scope of the project, budget, and timeline. It identifies the target audience and their needs, as well as the desired user experience and design aesthetics.
- A design brief for a product packaging design that highlights the inspiration behind the design, such as nature or minimalism. It includes information on the brand identity and key messaging to be conveyed through the packaging.
- A design brief for a logo design that provides an overview of the business and its values. It outlines the desired look and feel of the logo, including color preferences and any specific symbols or imagery to be incorporated.
- A design brief for a brochure layout that specifies the content to be included, such as text and images. It also outlines any branding guidelines to be followed and provides examples of similar brochures for reference.
Conclusion
Writing a design brief is one of the most important steps in any design project. Work through the eight steps in this guide, lean on the templates and examples, and you’ll end up with a brief that sets clear objectives, defines your target audience, and outlines the scope of the work.
Skip the brief, and you’re relying on everyone involved to independently guess at the same set of goals, which rarely works out. Put the time in up front instead, and the design process that follows tends to run considerably smoother.
From here, the next step is simply to start writing your own brief today.
Frequently Asked Questions
What is a design brief?
A design brief is a document that outlines the goals, requirements, and expectations for a design project.
Why is a design brief important?
A design brief helps ensure that everyone involved in the project understands the objectives, target audience, and constraints of the design.
How do I write a design brief?
To write a design brief, you need to gather information about your project’s goals and requirements, define your target audience and brand identity, outline any specific deliverables or deadlines, and provide examples or references for inspiration.
What are some essential elements to include in a design brief?
Some essential elements to include in a design brief are background information about your company or organization, project objectives and scope, target audience details, budget limitations (if applicable), timeline expectations, desired deliverables (such as logos or web designs), and any specific preferences or styles you have in mind.
Are there any templates available for writing a design brief?
Yes! There are many online templates available that can guide you through each section of a design brief and ensure you don’t miss any important details. These templates often include prompts to help you think through each aspect of your project.
